Historical field guide · 2021–2022 context
BLE Mesh implementation guide
This guide explains the planning work behind a Bluetooth Mesh lighting or building-device project: decide what the devices should do, how an installer would add them at the site, and how the team would test and document the result.
Historical reference: This guide preserves AHG's 2021–2022 overview of Bluetooth Mesh planning. It does not describe a current AHG BLE Mesh product or service.
Start with the building and the work
Define the mesh application
The first question was not which screen to build. It was what the lights, switches, sensors, and other devices needed to do at the site.
Bluetooth Mesh used Bluetooth Low Energy (BLE) messages so devices could take part in a mesh network. A project team still had to define the actual job: which fixture belonged to which room, which switch or sensor controlled a group, and what an installer or building manager needed to check.
A useful plan named the site, devices, people, control relationships, and expected result. It also recorded open questions about device combinations and job-site conditions instead of treating every project the same.
- Device manufacturer: define the hardware and device behavior.
- Contractor or installer: place, identify, group, and test devices at the site.
- Building team: explain how each room or equipment area should operate.
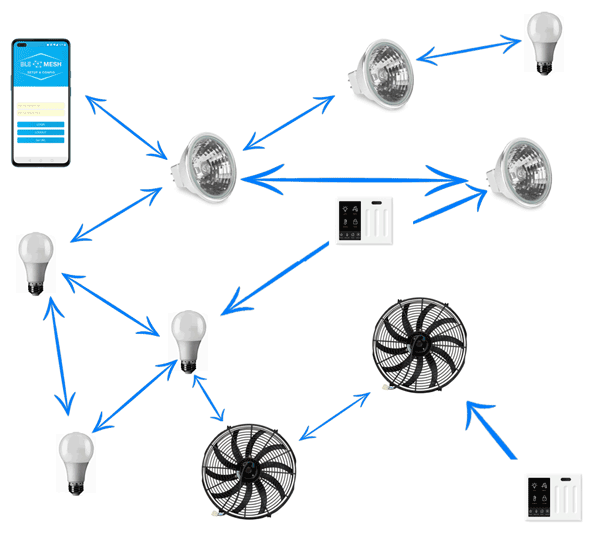
Give every device a known place
Plan provisioning and commissioning
In the original planning model, the installer used software at the job site to identify devices, add them to a project, and record how they should work together.
- 01Identify the deviceMatch the device in the software to the physical fixture, switch, or sensor.
- 02Add it to the projectRecord the device in the site setup before assigning its job.
- 03Assign the groupPlace the device with the room, zone, or equipment group it served.
- 04Confirm the controlsCheck which switch or sensor should act on which device group.
- 05Document the testRecord the result and any project-specific correction still needed.
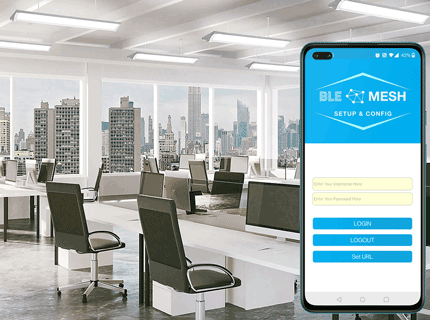
The mobile screen supported a field task
The software view helped an installer work beside the physical equipment. The installer needed a reliable way to match the screen entry to the correct device, apply the planned group, and check the control relationship before leaving the area.
The drawing shown here came from the original guide. Its logo, layout, and controls belong to that historical context.
Plan the whole device path
Choose hardware, firmware, and software components
A working project depended on several parts. Each part had to be selected and checked for the devices and job at hand.
Device hardware
The fixture, switch, sensor, or controller had to support the behavior defined in the site plan.
Device firmware
Firmware handled the device messages and exposed the settings, status, and controls the project used.
Commissioning and control software
Field software gave the installer a way to add devices, assign groups, set relationships, and check the result.
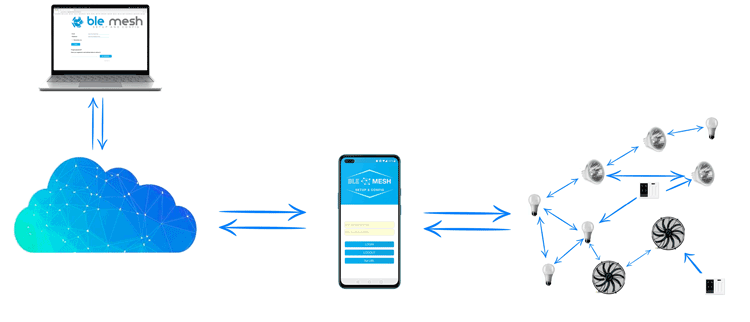
Cloud software was optional. A project might have used it when a team needed centralized records or later review, but the connection and record flow still had to be defined for that project.
Check the work at the site
Test the planned operation
Commissioning was not finished when a device appeared in the software. The team still had to test the intended action and leave a clear record.
A practical test record
- Device
Record the physical device and its installed location.
- Group
Confirm the room, zone, or equipment group assigned in the plan.
- Control
Operate the planned switch or sensor and observe the intended device response.
- Result
Write down what passed, what changed, and who needs to follow up.
Projects also had to answer their own hardware, firmware, installation, and mixed-device questions. The original guide treated these as planning and test items, not as a blanket compatibility promise.
Keep the date and purpose clear
Further historical reading
This page keeps the original planning concepts available without restoring the retired BLE Mesh pages or presenting them as a current service.
Questions about this historical guide
What should a BLE Mesh implementation plan cover?
A BLE Mesh implementation plan covered the site, devices, user roles, hardware, firmware, commissioning and control software, installation, testing, and project documentation.
How were devices provisioned and commissioned in a BLE Mesh project?
In the planning model described here, an installer identified each device, added it to the project, assigned its group, confirmed the control relationships, and recorded the test.
When might cloud software be part of a BLE Mesh project?
Cloud software was a project choice for centralized records or review. It was not required for every BLE Mesh project, and this historical guide does not describe a current AHG cloud offering for BLE Mesh.